Connect Gemini CLI and Condens
Open your Gemini CLI settings.json (read more). If it doesn't exist yet, create it. Add the following under the
mcpServerskey:For an EU-based server location:
    {
"mcpServers": {
    "condens-mcp": {
      "url": "https://api.condens.io/mcp"
    }
  }
}
For a US-based server location:
    {
"mcpServers": {
    "condens-mcp": {
      "url": "https://api-us.condens.io/mcp"
    }
  }
}
If you're unsure which region your workspace is on, the correct URL is always visible in Settings > Account > API & MCP Server in Condens.
Note: If you already have other entries in yoursettings.json, add thecondensMcpblock inside the existingmcpServersobject rather than creating a new one.
Start the Gemini CLI using the following command:
geminiThen run:
/mcp auth condensMcpGemini CLI will redirect you to a new browser tab saying the app could not be authorized. This is expected: the page is showing you the Redirect URI you will need a bit later, so please copy it.
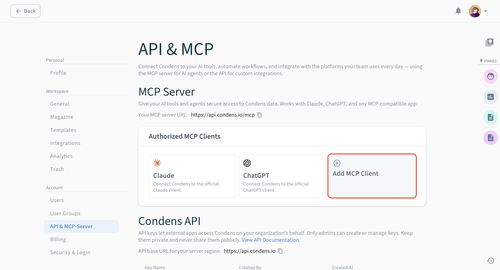
Open Condens in a new tab, and then go to Settings > Account > API & MCP Server, then click on + Add MCP Client.
Configure the MCP client:
Add a Client name (for example, Gemini CLI) and Description, and upload a logo.
Add the redirect URI from Step 2, alongside the following redirect URIs:
http://127.0.0.1:*http://127.0.0.1/http://127.0.0.1http://localhost:*http://localhost/http://localhostUnder Available for, select which users, roles, or user groups should have access. Once configured, these users will be able to view this MCP client in their own account in Settings > Integrations. They will still need to authorize it individually to enable it on user-level.
Click Create to finish.
Go back to the authorization tab from Step 2. Reload the page, and then click Continue to authorize the app. Once you confirm, the CLI will display a success message and reload the server automatically.
To confirm the server is connected, run the following command:
/mcpYou should see:
condensMcp - Ready, meaning that you can now query your Condens research directly in Gemini CLI.
