Stage 1: Add a new MCP client in Condens
In Condens, an Admin needs to:
Go to Settings > Workspace > API & MCP Server.
Click
 Add MCP Client.
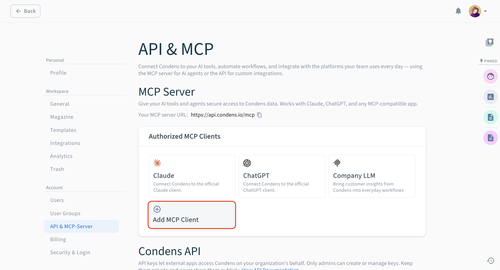
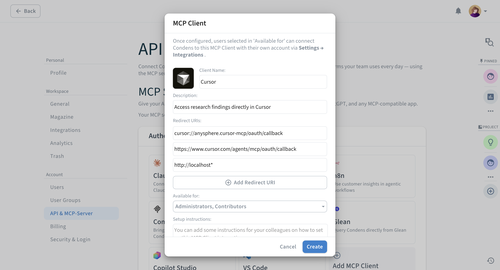
Configure your MCP client:
Add client name, description, and logo.
Add these Redirect URIs:
cursor://anysphere.cursor-mcp/oauth/callbackhttps://www.cursor.com/agents/mcp/oauth/callbackhttp://localhost*http://localhost/http://localhostSet which users, roles, or user groups this MCP client is Available for. Once the client is configured, these users will be able to connect to this MCP client via their own account.
Once you're done, click on .
Check the correct MCP server URL, visible in your MCP Server Settings in Condens just above the authorized MCP clients — you will need to copy and paste it . Depending on your server location, it's either:
https://api.condens.io/mcp(EU) orhttps://api-us.condens.io/mcp(US).
Stage 2: Create a custom MCP in Cursor
In the Cursor app:
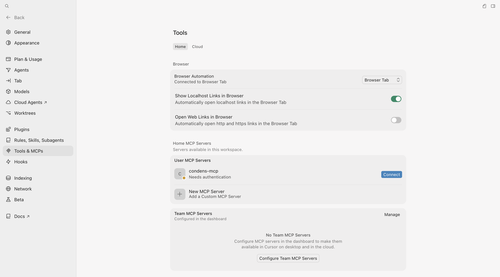
Open Cursor settings and go to the Tools & MCPs section. There, click on .
Replace the mcp.json file's content with:
For an EU-based server location:
    {
"mcpServers": {
    "condens-mcp": {
      "url": "https://api.condens.io/mcp"
    }
  }
}
For a US-based server:
    {
"mcpServers": {
    "condens-mcp": {
      "url": "https://api-us.condens.io/mcp"
    }
  }
}
Click Save File.
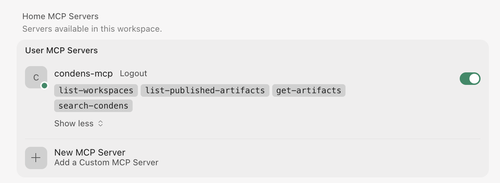
Your Condens MCP server should be visible in the Home MCP Servers list. From there, please click to authorize it.
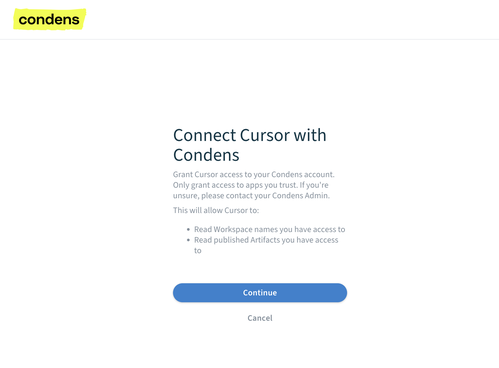
You will be redirected to a new tab to confirm the connection between Cursor and your Condens account. Click .
That's all! You should be able to see Condens enabled and ready to use.